
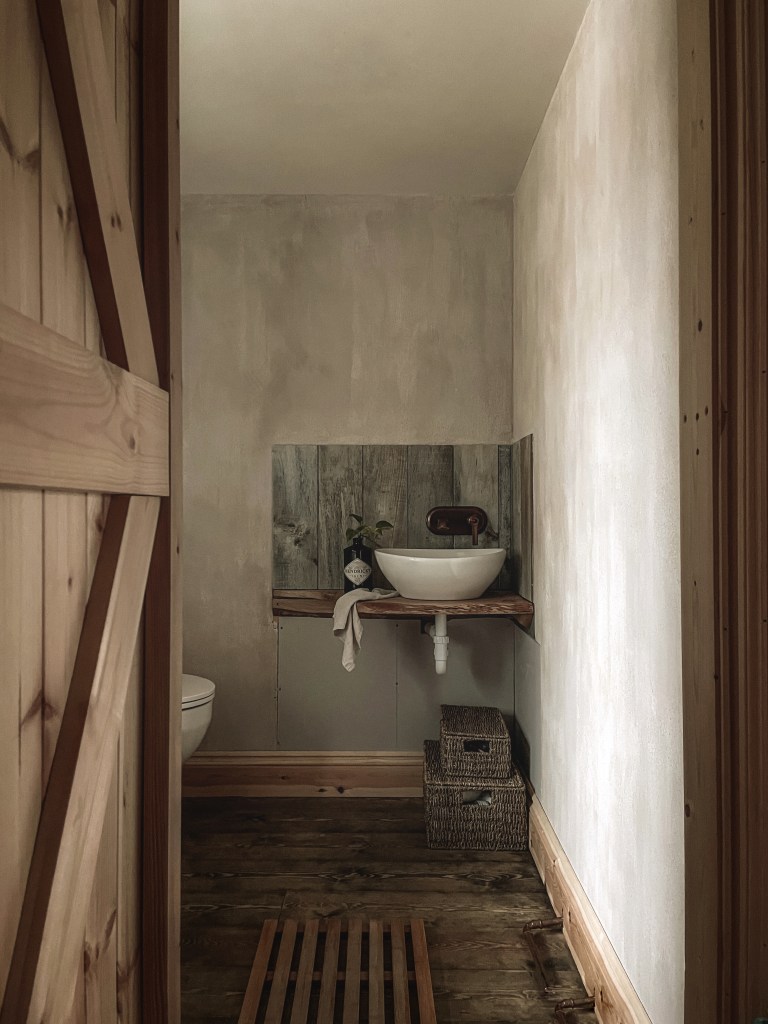
Smooth, untextured walls be gone!
Old houses call for traditional building methods, one of which is lime plastered walls. That bumpy, crumbly effect instantly offsets texture and very little more is needed to make the wall stand out with va va voom.
There were a few walls in the house, however, where we either could not plaster in lime, or were advised not to. So I had to get creative. And it worked! Those walls in question are a talking point when I’m giving visitors a tour (people always want a tour when you’re renovating, have you noticed?)
If you want to give your walls an authentic traditional lime plaster effect (without the traditional lime plaster itself) this is how to do it. It’s very straight forward and you do not need any special set of skills to pull it off. If I can do it, you can.
Step 1. Add Texture
This is an essential step in getting that bumpy, organic texture of authentic lime plaster. However, I have skipped this step on a few walls in the farmhouse and do you know what? It still works (provided you follow the painting technique in step 2 and 3 – we will get to that).
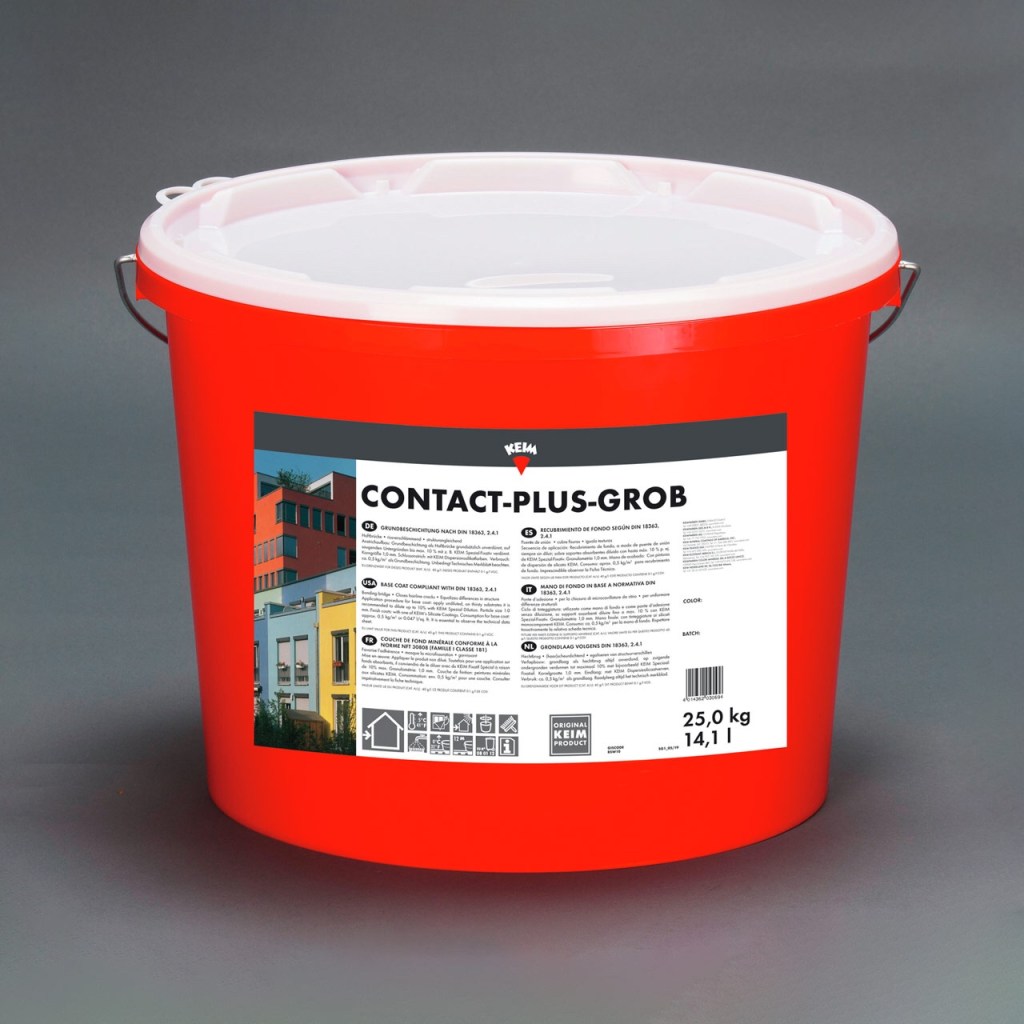
So, start by adding your texture with some of this wonder product, Keim Contact-Plus Grob . Apply with a standard brush (for walls with a larger surface area, go for a wider brush or you could be there a while…) just be sure to wash it thoroughly after. The product contains particles to give it that textured-effect, and they will transfer to whatever product you use the brush with next if you don’t.
Apply this product in single-stroke motions and with some elbow grease. Without sanding crass, you need to slap it on. Don’t overwork it; you will end up brushing the product out. Remember your aim is to create textured walls, so don’t rub that texture out.
Step 2. Choosing Limewash
Another crucial step in creating that textured look is using the correct type of paint. Limewash has a high water content and therefore blends in seamlessly with itself.
How you apply the Limewash to the walls is your choice (though if you think you can apply in the same way as you would emulsion, think again) but it really does need to be Limewash if you want that authentic plaster effect.
Colour, again, is your choice, but a word of advice. Lighter colours (think sand or stone families) will be more subtle. Darker, deeper hues will produce a stronger effect, so think about how you are going to be using the room and what natural light it receives.
Step 3. Applying Limewash
Remember when I said how you apply the limewash is your choice? It is, but I have a preferred method that I’ll share with you. It hasn’t failed me yet, and the number of walls I’ve painted in this way has reached double digits.
You can get a preview of how I apply the limewash below. I think of the pattern in which I paint as stars; I place my brush in the center of the ‘star’ and paint outwards, bring it back in and repeat in the next ‘prong’ of the star, continuing around until I have a loose interpretation of a star. I then move across the wall, ensuring there are overlaps of the paint (and no gaps) but not overworking it or going over the same place too many times.
The quality and size of brush here is crucial. Go for a wider brush head for a less intense effect. These Axus Professional Brushes haven’t failed me yet. They have soft bristles and apply the limewash in the smooth, seamless way it needs for this aged plaster effect.
You will need to apply at least 2 coats of the limewash in this way.
Are you thinking of trying this aged limeplaster effect on your walls? Let me know in comments, and be sure to follow along with my Instagram for more DIY renovation tips.
Kelly x

Leave a comment